Appearance
Getting started
In this docment, we will use Figma as an example to demonstrate how to use Codify.
Start the Codify plugin
To begin, log in to Figma and click on "Resources" in the top navigation bar or use the shortcut "Shift + I" to open the plugins window. Search for the Codify plugin and click on "Run" to activate it.
Register for a Codify account

Why sign up for a Codify account?
ou can configure your project mapping files and parsers on your Codify account and then utilize these configurations through the Codify plugin. Additionally, you can create collaborative teams to share your mapping files and parsers with team members. However, all of these functionalities require an account system. Importantly, your Codify account is usable across multiple platforms.
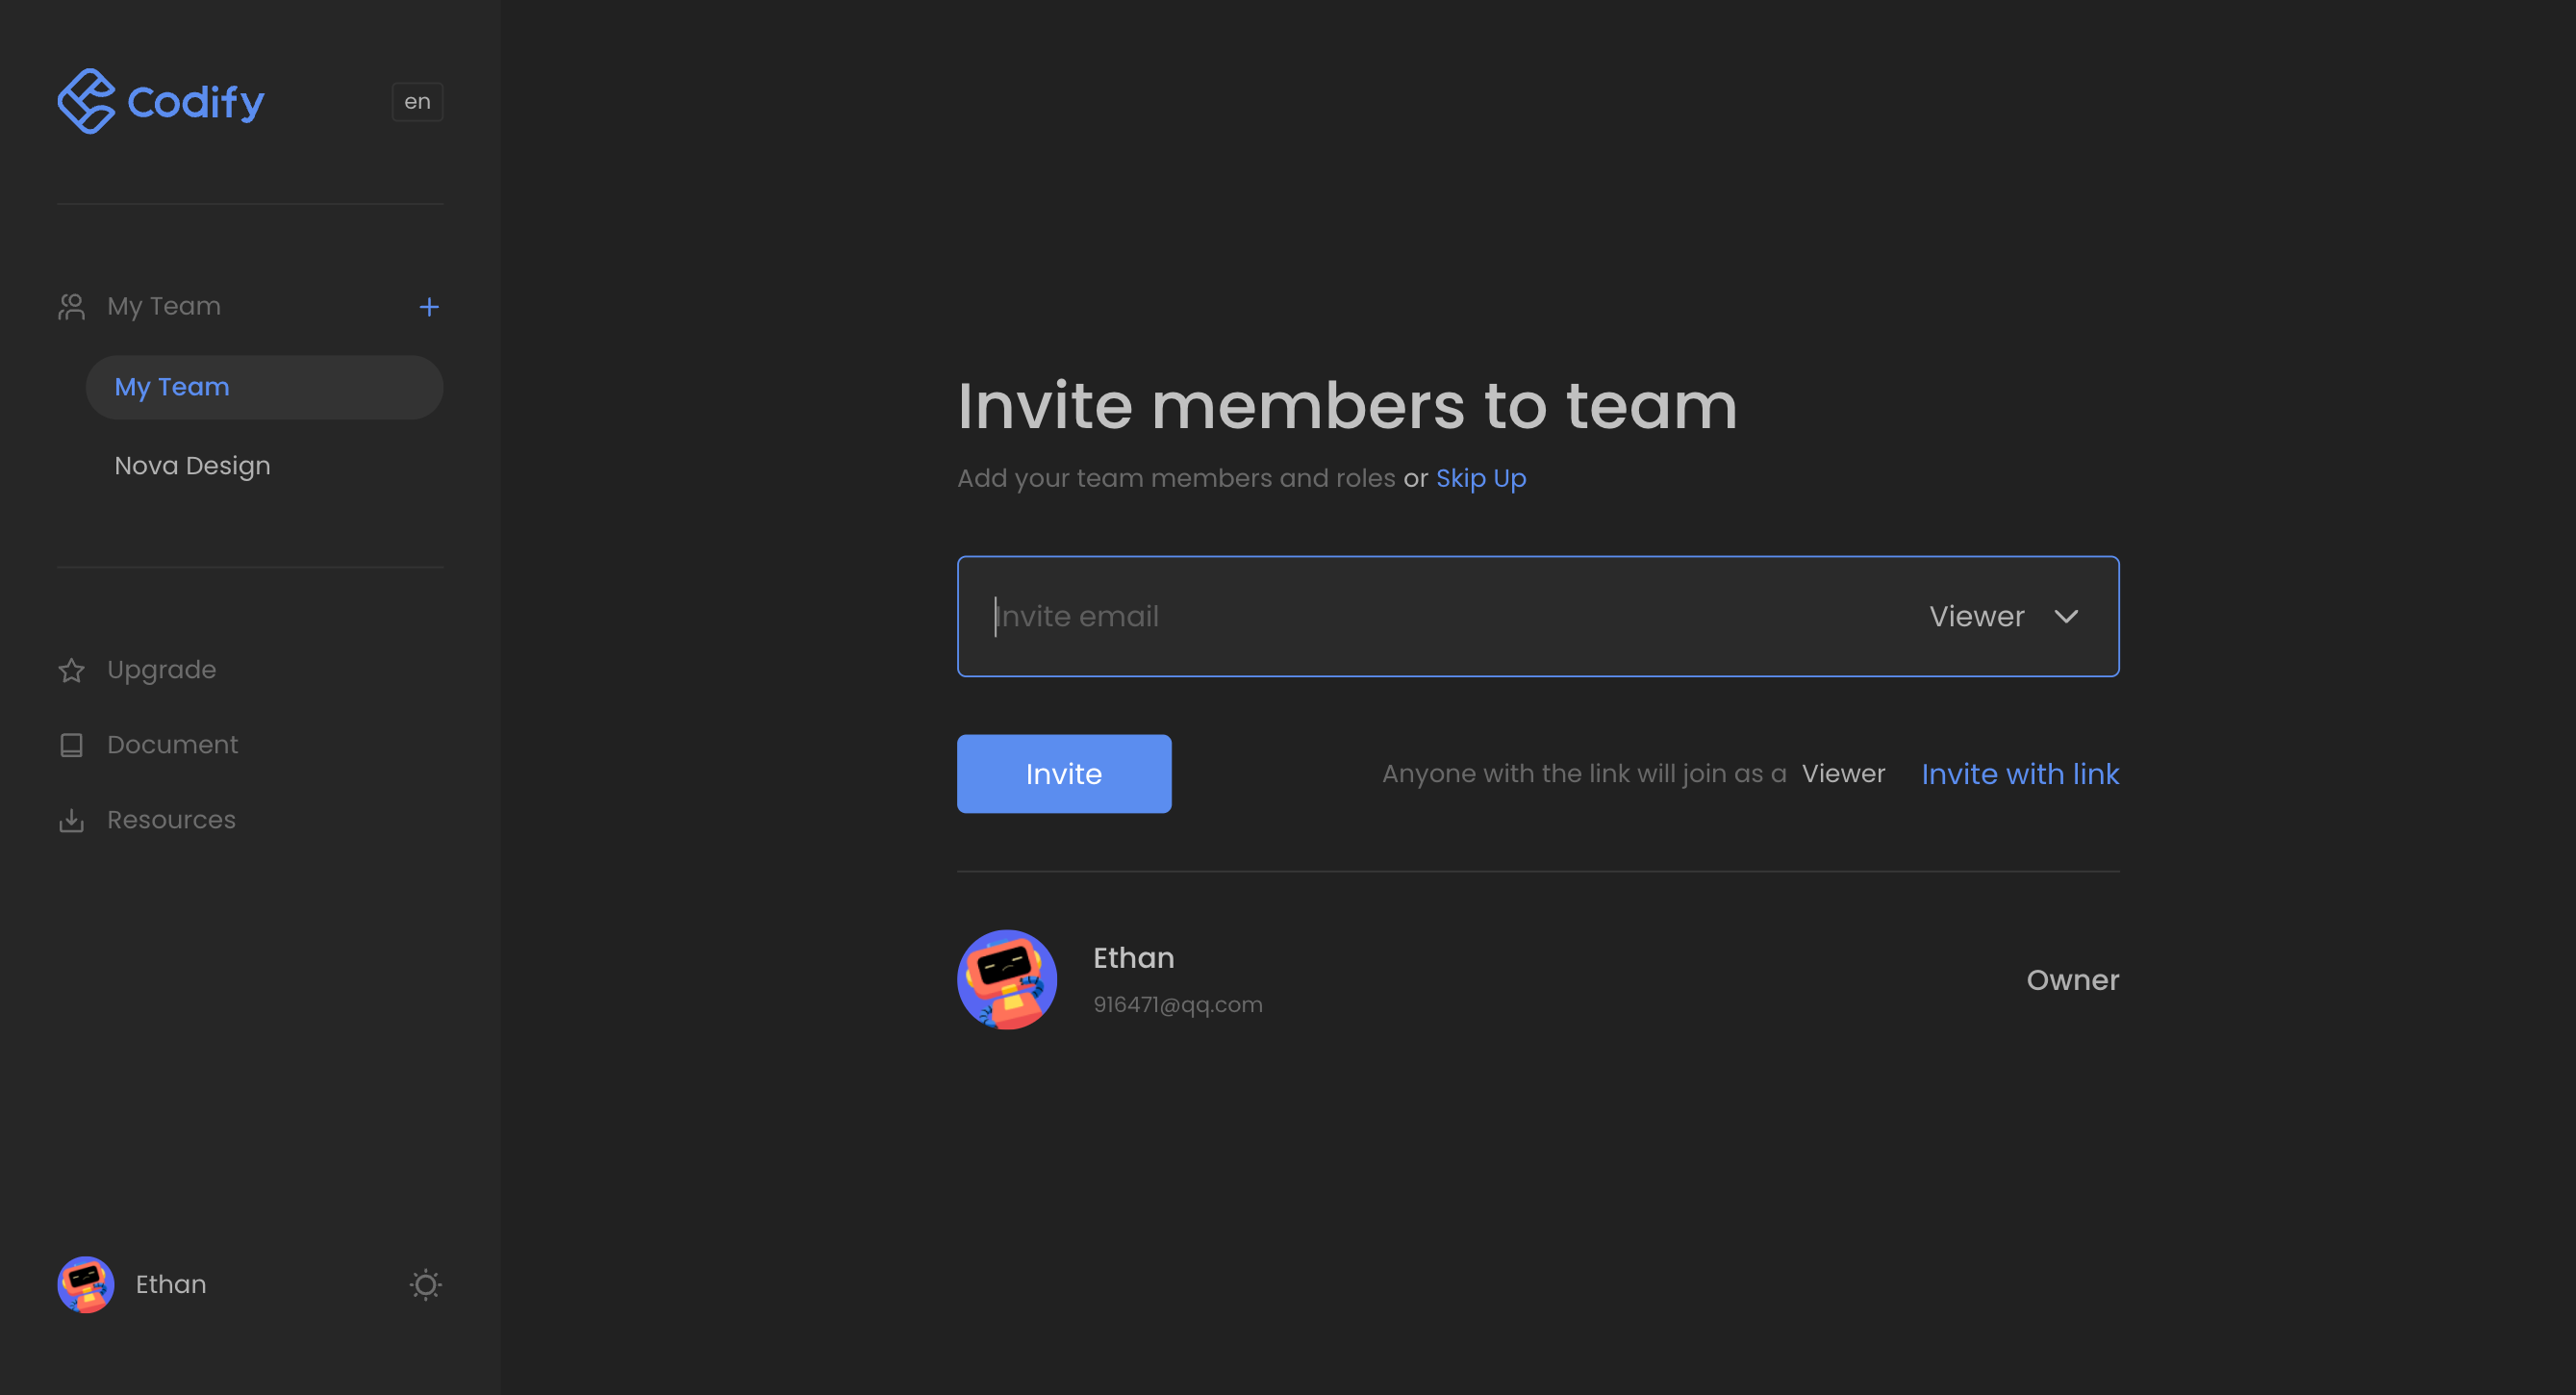
Create teams
Regardless of whether you are a subscribed user or not, you can create teams without any limitations on the number of teams you can create. You can invite members to join your teams as well.
Parsing and Mapping
The Codify backend provides four code editing tools for configuration files. You can choose the appropriate configuration based on your needs, and they are all in JSON format.
If you are a designer, we recommend inviting frontend developers from your team to write the configuration files so that they can obtain the code format they require. If you are a developer, please continue reading the following Configuration File Writing Guide
Configuration File Writing Guide
Understanding your requirements and creating the configuration file based on those requirements can help save you time.
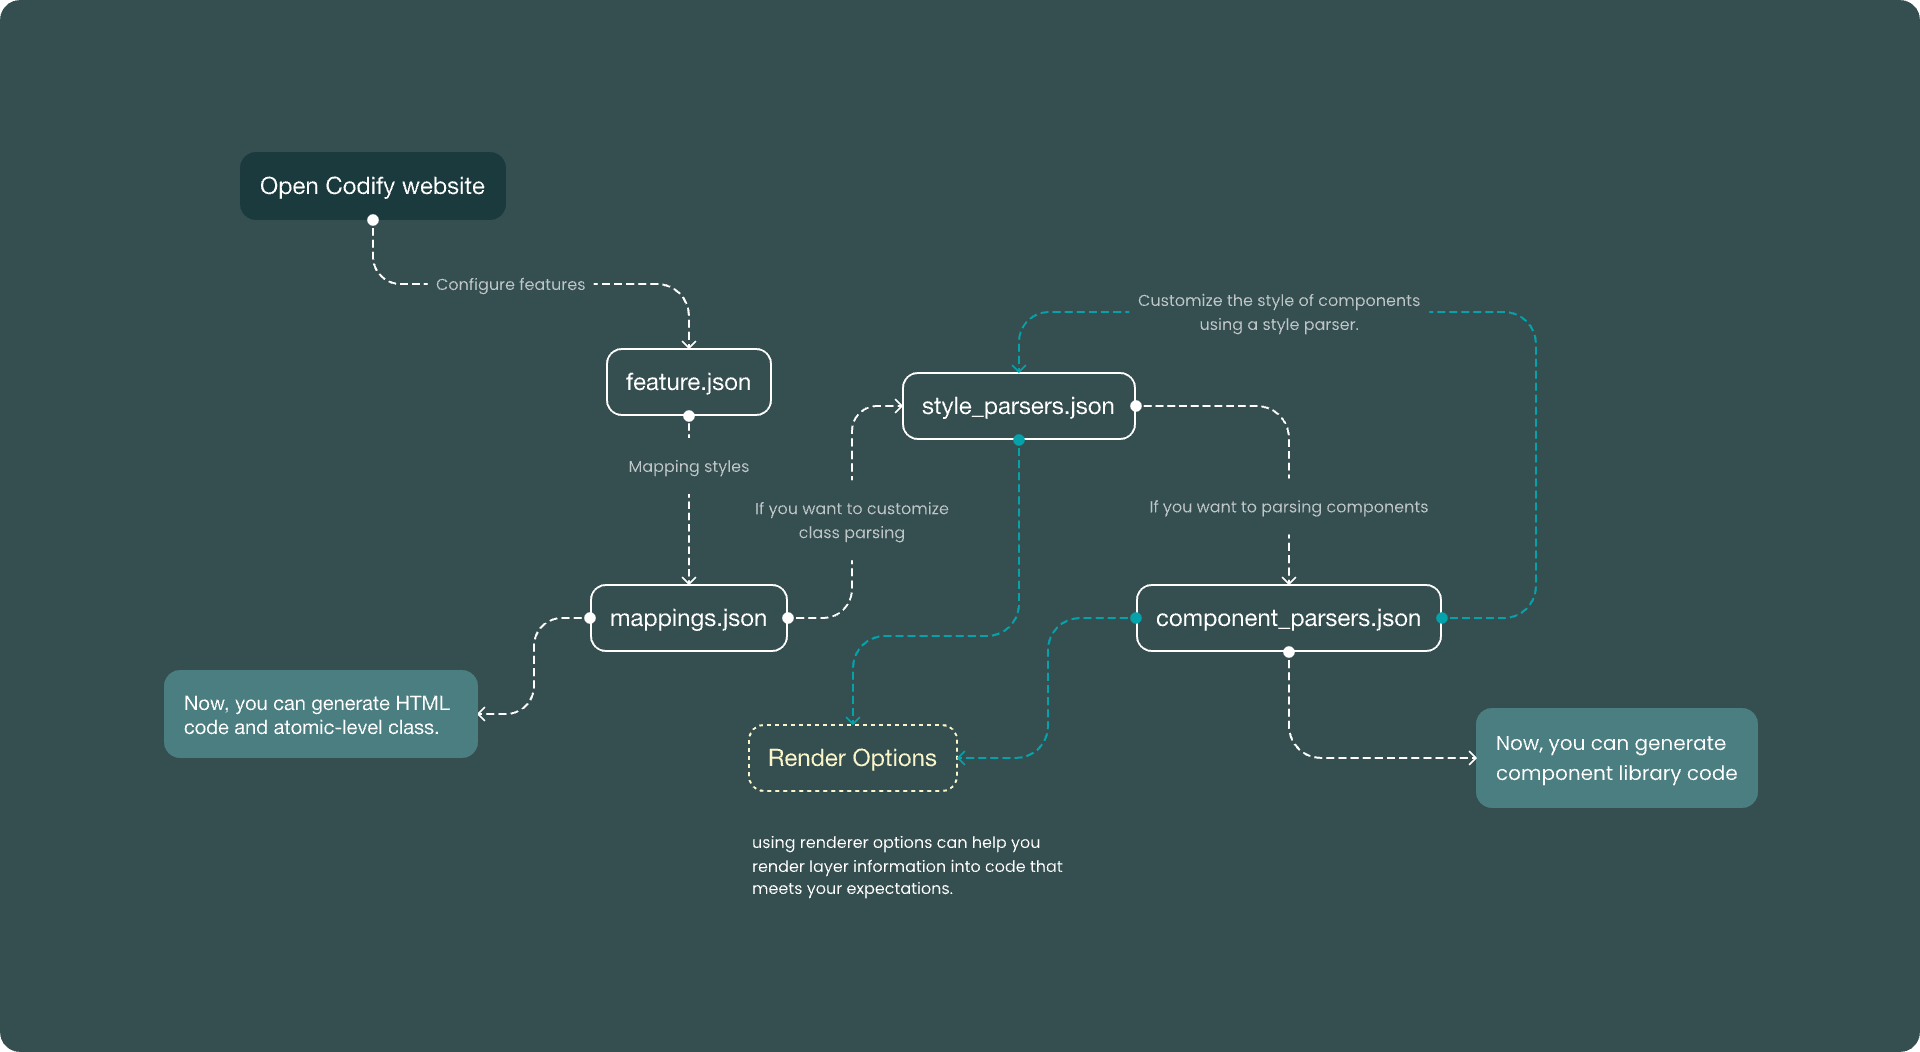
- Generating only HTML code and inline styles: No configuration is required. Please proceed to Use in Figma
- Configuring overall code features: Feature setting
- Customizing class names: Mappings
- Customizing the parsing of certain styles from the design file: Style parsers
- Mapping design components to frontend components: Component parsers
Feature setting
You can copy and paste the following content into the corresponding files to get started quickly. For detailed instructions, please refer to the Configuration section in the left menu.
json
{
  "playground_url": "http://your.playground_url.com",
  "component_prefix": "",
  "ignore_prefixes": [
    "$config"
  ]
}
The Feature Library is used to define project features, such as preview interfaces, component prefixes, and ignored prefixes.
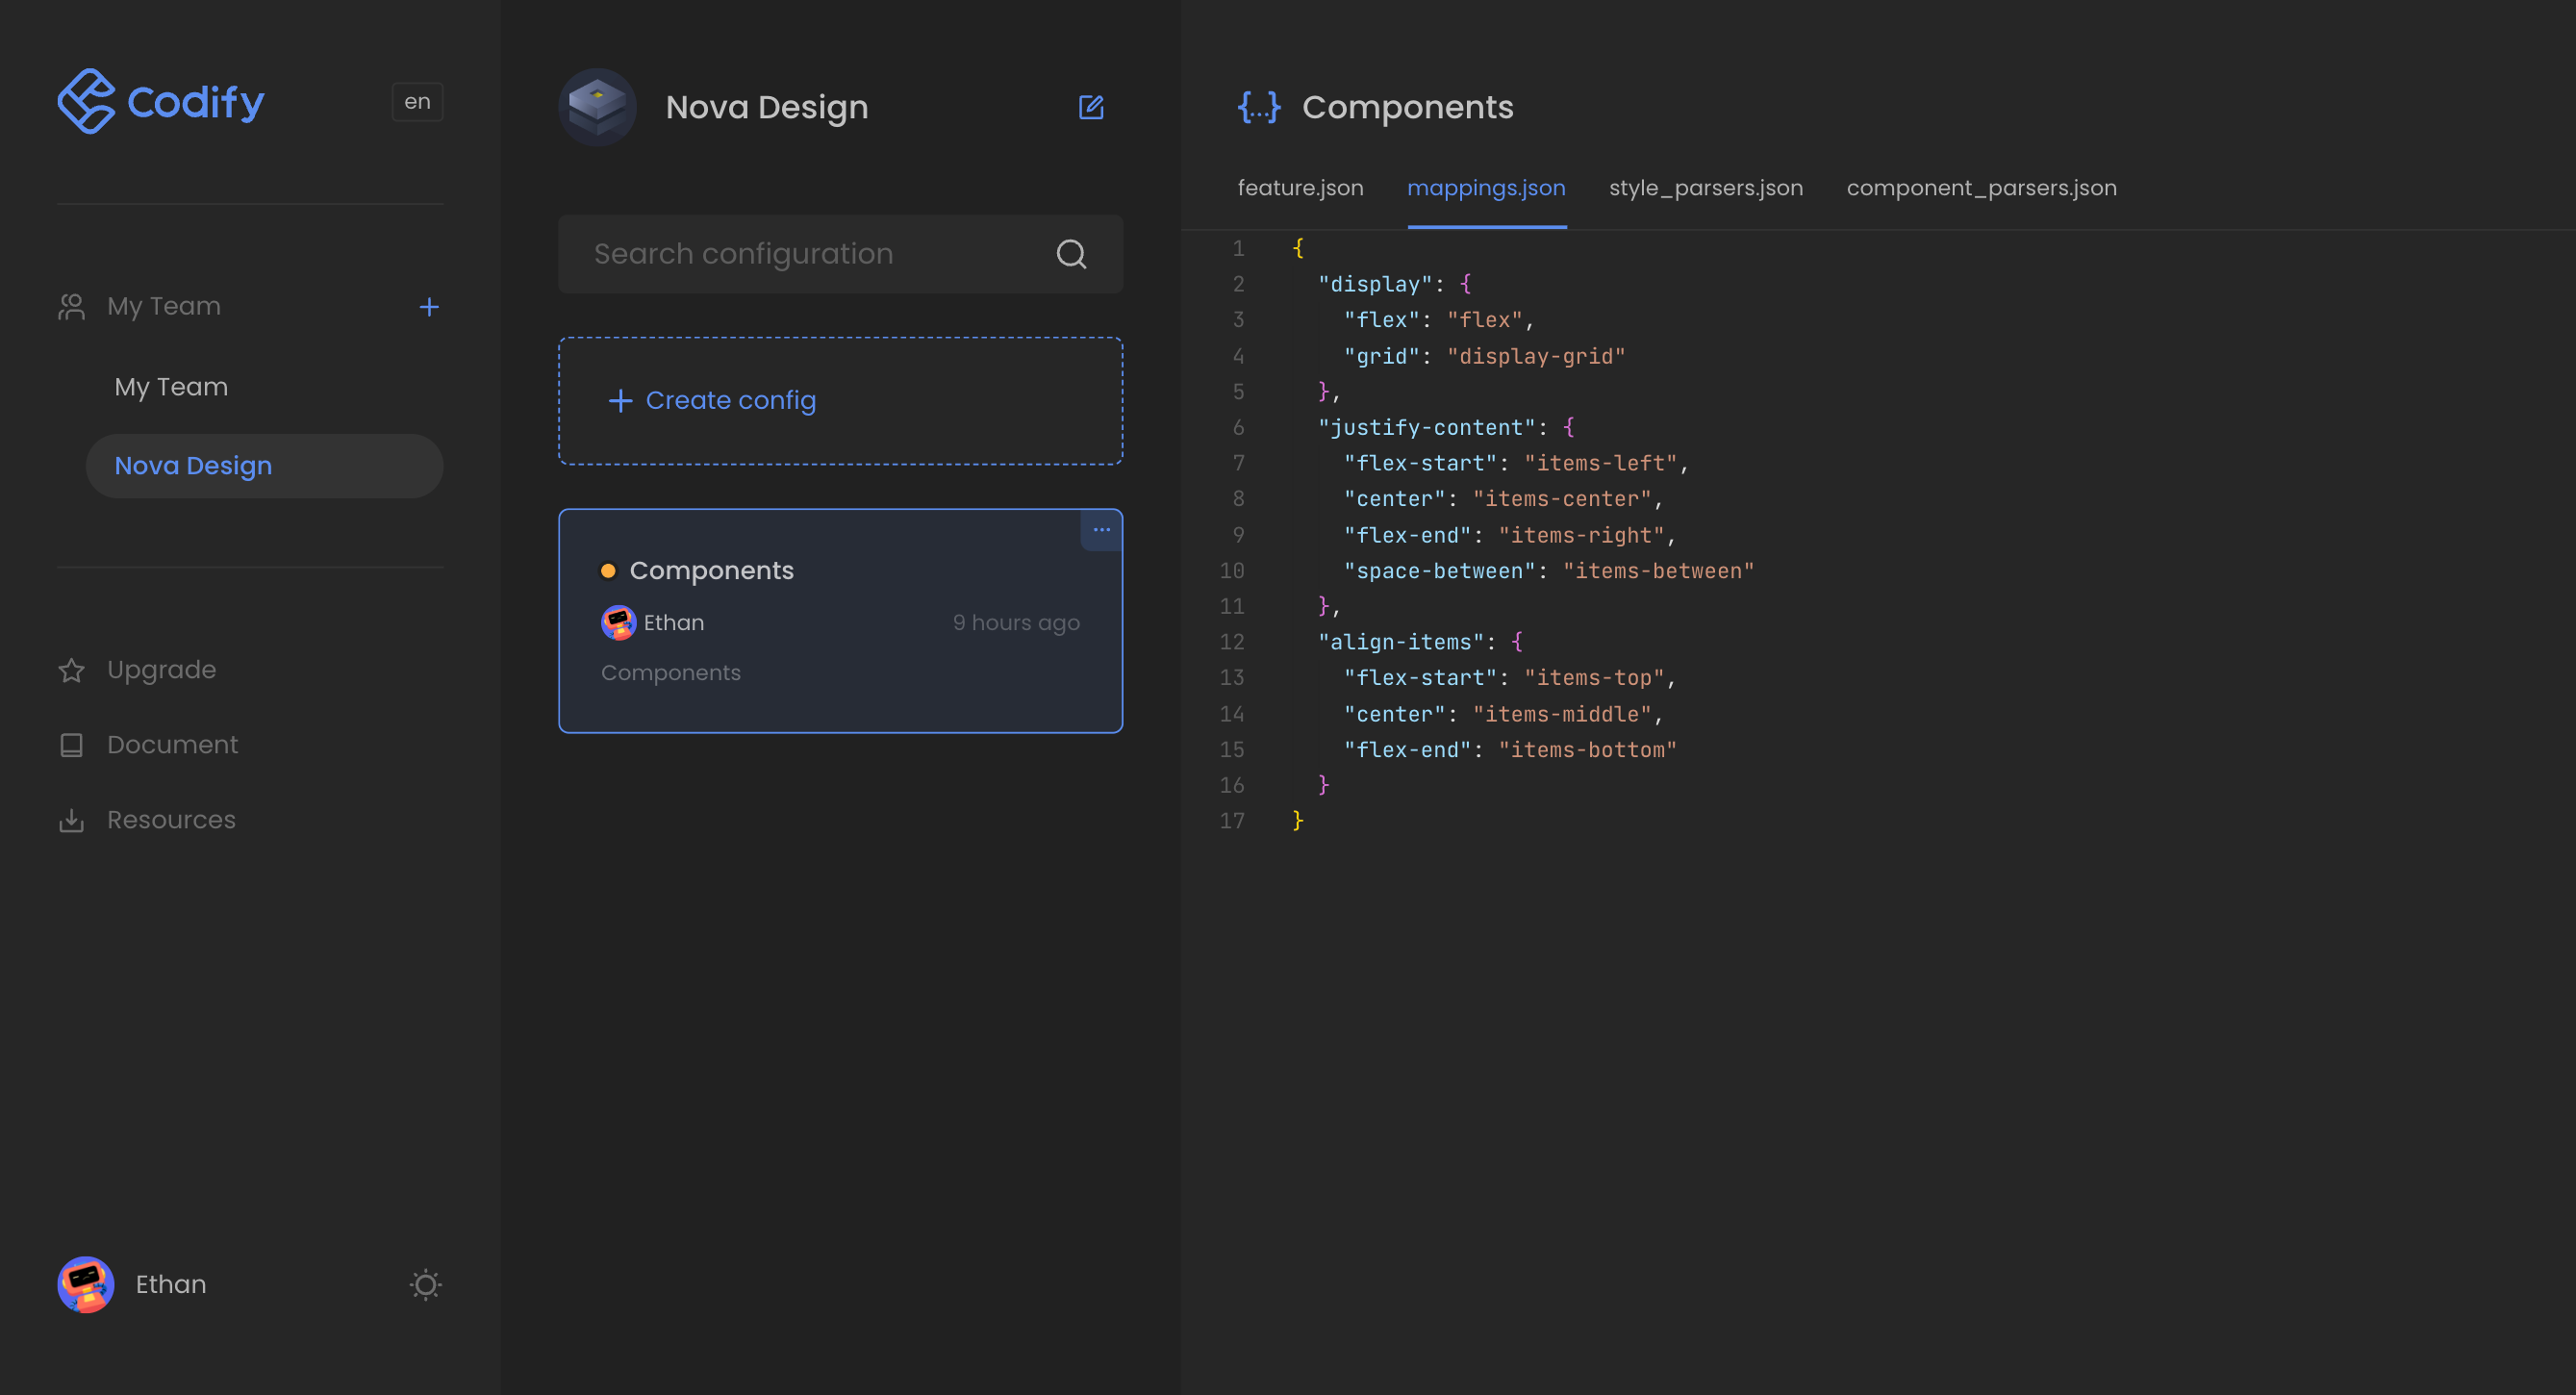
Mappings
Mapping Figma API output styles to class names.
json
{
  // "css attrs": {
  //   "figma styles": "Output the Class name you want",
  // },

  "display": {
    "flex": "flex",
  },
  "justify-content": {
    "flex-start": "items-left",
    "center": "items-center",
    "flex-end": "items-right",
    "space-between": "items-between"
  },
  "align-items": {
    "flex-start": "items-top",
    "center": "items-middle",
    "flex-end": "items-bottom"
  }
}
Style parsers
Due to the limitations of the Figma API, Codify provides default support for the following style parsing. However, these styles are already sufficient to generate a complete layout code.
json
{
  width: {},
  height: {},
  display: {},
  flex: {},
  justifyContent: {},
  alignItems: {},
  direction: {},
  gap: {},
  text: {},
  color: {},
  fontSize: {},
  fontFamily: {},
  textAlign: {},
  fontWeight: {},
  lineHeight: {},
  letterSpacing: {},
  padding: {},
  background: {},
  borderStyle: {},
  borderColor: {},
  borderWidth: {},
  radius: {},
  opacity: {},
  boxshadow: {},
  position: {}
}
Component parsers
The following configuration demonstrates how to output code for a frontend component through configuration.
json
{
  "button": {
    "props": {},
    "type": {
      "valueFrom": "background"
    },
    "text": {
      "nodeName": "_text"
    },
    "disabled": {},
    "flex": {},
    "traverse": {}
  }
}
Please refer to the Component parsers section for specific configuration instructions.
Use in Figma
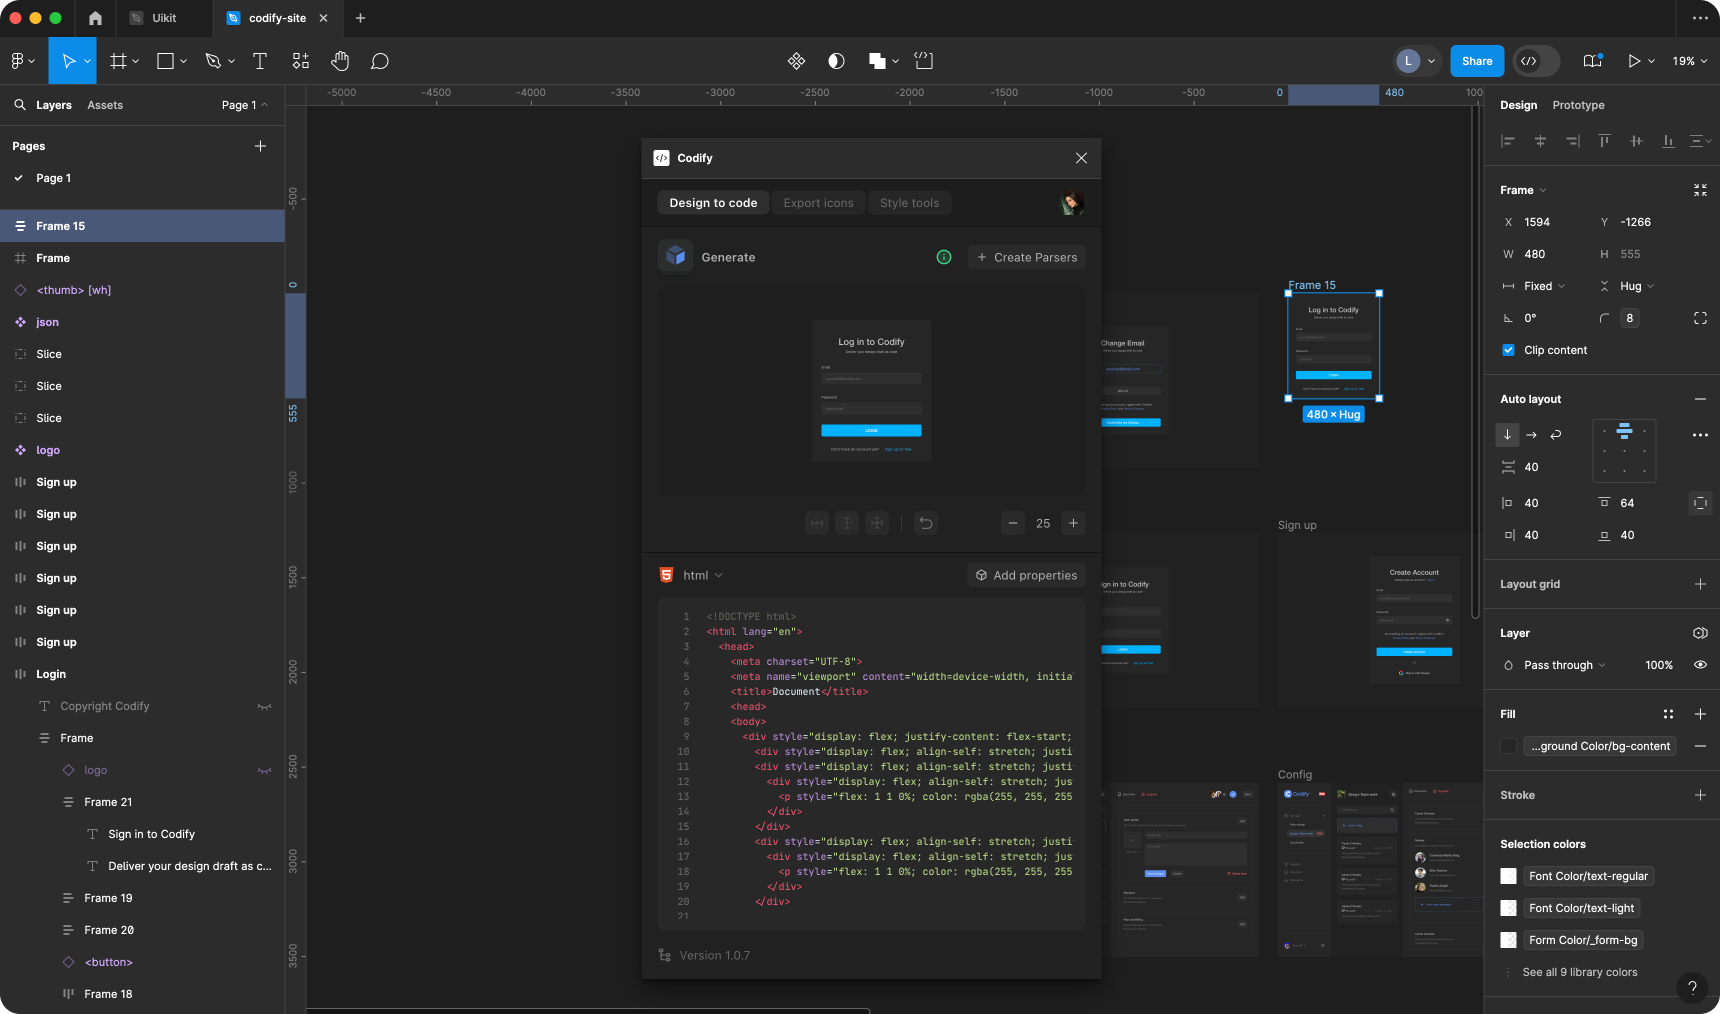
Now you can use Codify in Figma to generate high-fidelity code.